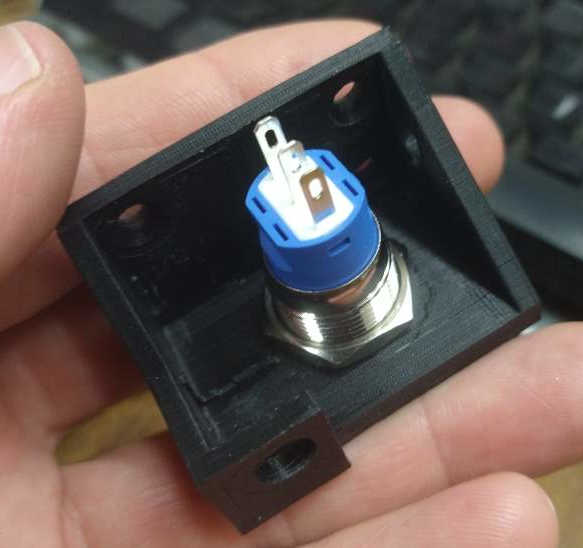
The medusa Mirror was built around a 3amp power supply with an inline switch on it.
Problem was, I couldn’t find a beefier unit with an inline switch. After sitting for an hour in a tire place on Amazon, this is what I came up with.
And then design and 3d print a custom frame to hold the switch.
Design the part in tinkercad:
It was here that I realized I had misspelled the name.
It was an easy fix at least.
While the fix is printing, I’ve got a practice part to play with.
and Practice my inset while I wait.
this is the female the adapter will plug into.
It’s too big to fit and needs to be chopped.
New part is finished.
Inset is done (it looks better in real life, pic is zoomed in) and you can see my finished chop of the female part in the background.
the hardware is in:
Soldering it up was a booger and I forgot to take pics.
Here’s a video of it finished:
It’s actually an instructional video for the customer on how to install it but the beginning shows “What it is, why, and how it does it’s supposed to do”.
Seems only right to be working on Medusa during an eclipse.
It was crazy. Some large bird started screeching for like 15 minutes straight. Definitely spooky.
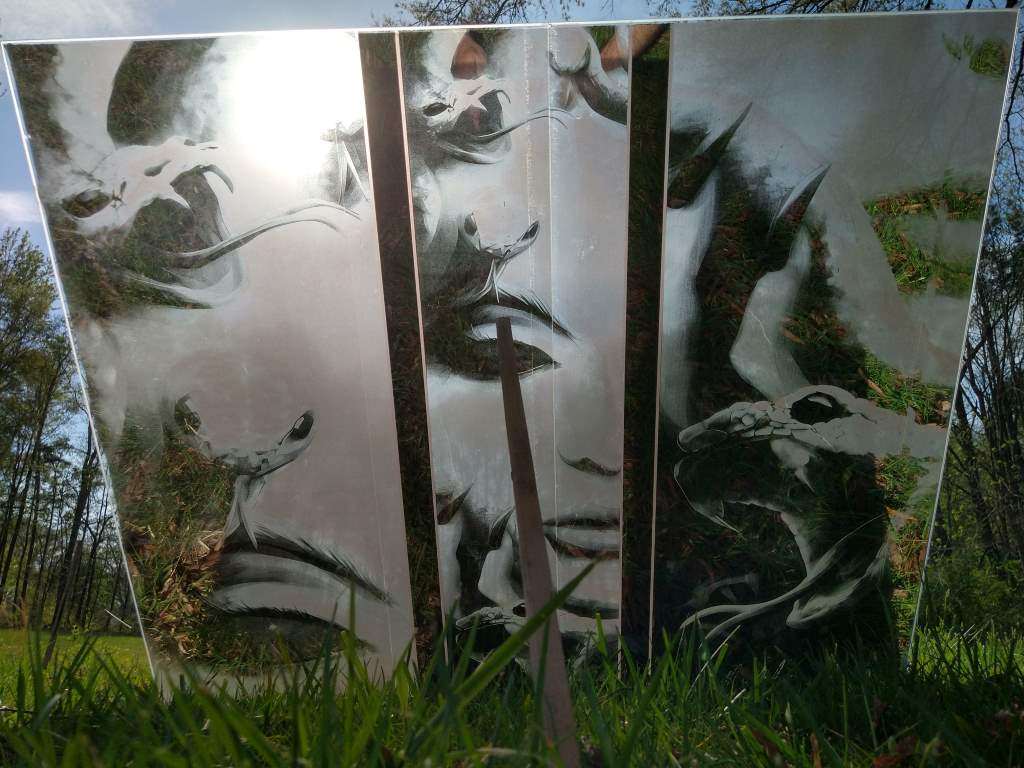
And I’ve backlit it with the eclipse for customer approval.
i’ve decided to finish the piece regardless.
I can’t easily describe the machines I’ve had to build / upgrade… new techs I’ve had to learn to bring this to life. so this piece is a triumph for me.
If the customer doesn’t like it due to print issues, no worries, I’ll make another for her and finish this one for myself.
Hell, I might even hang it in the shop in place of my AVXpro sign.
4/9/2024 apply vinyl
Always good to get Zilla back on the wall. My shop is small so it’s really hard to work around the machine while it’s down.
I haven’t seen my workbench for awhile. It’s a good to see it again!
You like my sexy legs? Oh yeahhhh 😛
I’m going to heat the mirror:
so I’ll elevate it off the table with these M5 nuts. (I don’t need it high).
And some cotton over the nuts to prevent scratching.
I ran out of vinyl 🙁 BOO!!!
Not really worth turning the iron on if i don’t have enough to complete the job…
So I covered it with plastic, ordered the stuff I need and hopefully it’ll be in tomorrow.
4/10/2024 apply vinyl
New stuff came in ontime.
Fake it till you make it…. This… SHOULD… work….
Mirror cracked from the heat
It was my fault, not the process. I got complacent and stayed in one area too long.
Crack runs pretty far out, breaking off two corners.
This is less than ideal but not a dealbreaker.
Customer wants the mirror cracked in the end result, so the more cracks the better.
Problem is: I’ll have to figure out a way to flip a large mirror that is no longer structurally sound.
I’ll figure it out later.
vinyl is in place, bonded good.
Now to just remove the clear shiny backer and good to go.
Shit.
I’ll admit. I was cussing.
It was like the glue between the clear and the vinyl was way tougher than it needed to be. Vinyl stretched and delaminated from the mirror.
Now what???
Can I laminate by touching the iron directly to the vinyl without the clear protection?
A friend of mine, DC, asked me if I could share some pictures of what I do for his daughter.
I’d be happy to.
Here’s a typical setup:
The work starts in photoshop like normal (This is GIMP. It’s free. I’m cheap.)
It’ll go to imag-r.com to do the dither. GIMP can do a dither, but it imag-r looks better.
See how it’s all dots on the screen now?
Anyways, this is a small swatch, a point of interest that has been moved into the software that controls the laser. In this case we are doing a Medusa mirror so we are looking at a snake head that has both lights in the head and darks in the neck…. full spectrum of “color” if you will.
If we can make out the curvature of the head and still be able to see the neck in our test, we’re good to go. Easy peasy right?
So we’ll run a few copies of the swatch… making educated guesses to change the settings into focus with each one.
writing each change and observations as we go….
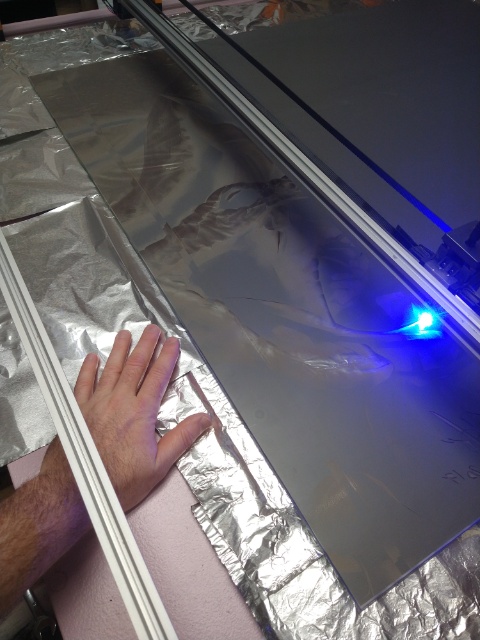
This is the machine running the project by the way. It was custom built specifically for this particular Medusa mirror job. The rails are 1200mm, 47.2 inches.
Back to finding our settings:
I stow this light thing on the ceiling when not in use. I think it’s an artist’s tracing light. I don’t know. My Aunt Karen got it for me so shop ID = “Karen”. I use it all the time.
Here is our target:
I think number two from the right is going to be our best bet. The first one from the right is over-burnt and you can’t really tell the details of the neck in any of the others. The second one seems just right. You can barely tell the head and you can see the neck. A good compromise.
So…..
It’s just a matter of checking back to our notes and here’s our settings. Good to go!
Now it’s just a matter of framing it. I’m just tracing the outline of the project right now and lining up the mirror to where the machine thinks the mirror is. I usually trace the very exterior of the piece so that the laser is half on / half off the edge. I find there’s less margin for error that way.
AND BURN.
A COUPLE OF HOURS INTO THE BURN:
Progress looks good.
I believe I’m seeing the aluminum foil bed through the glass so that’s a good sign!
This one’s “quality over quantity” so check back in a few days. I’ll be sure to update.